Template Manager 
Introduction 
Create a template is as simple as creating a checklist. But if you need to create several similar or identical checklists, first create a template, then you can create the checklists you need with a few clicks.
The Template Manager 
To access the Template Manager, go to checklist Manager, then click the drop-down menu located on the right side of the "Create checklist" button. Finally, click in More templates.

Create a checklist from a Template 
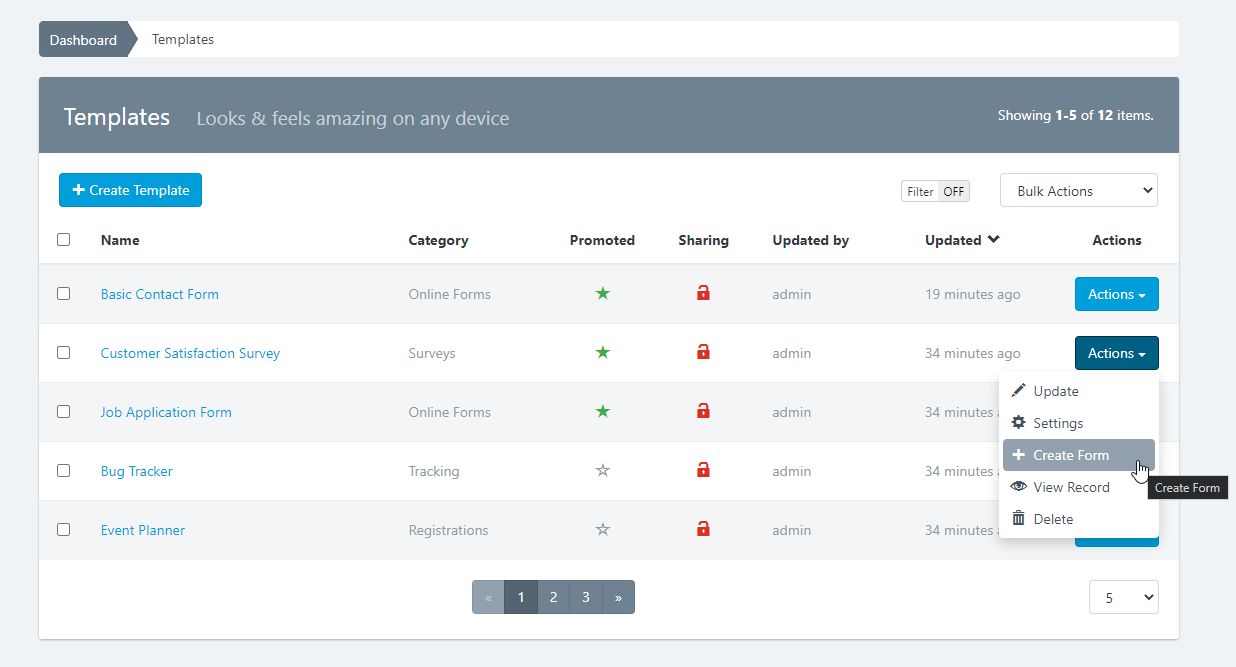
To create a checklist, perchecklist the following steps:
- Click the Actions button on the chosen template.
- Click Create checklist
- checklist Builder opens, and the template will be displayed in the preview.
- Click Save
Create a Template 
To create a template, follow these steps:
- Go to the Template Manager
- Click on "Create Template" button
- The checklist Builder will open, but this time will create a template.
- Add the fields and make the changes you need.
- Click Save
Edit a Template 
To edit a template, perchecklist the following steps:
- Go to the Template Manager
- Click the Actions button on the template to be edited
- Click Update
- The checklist Builder will open, but this time to edit the template.
- Make the changes you need
- Click Save
Share a Template 
To share a template, perchecklist the following steps:
- Go to the Template Manager
- Click the Actions button on the template to be edited
- Click Update
- Shared With: This feature allows you to share the template with other users. You have three options:
- None: The template will only be visible by its creator (without considering the administrator who can see all the templates).
- Everyone: The template will be visible by all users of the application. Only managers can share templates with everyone.
- Specific users: Allows you to select the users who will be able to see the template. Related permissions: Includes the word "Shared" in his name. For example, viewSharedTemplates, editSharedTemplates, deleteSharedTemplates.
Important! Keep in mind that although a user can share a template with another user, this user must have the permissions to view, edit, delete, etc. required for each action. For example, if you share the template with two users with different roles: Basic User and Editor. The basic user could only have access to use the templates to create his checklist, while the Editor user could access the checklist Builder to update the template.
Promoting a Template 
Promoting a template allows you to create a checklist without having to go to the Template Manager. You will be able to do it directly from the dropdown menu at the right of the Create checklist button.
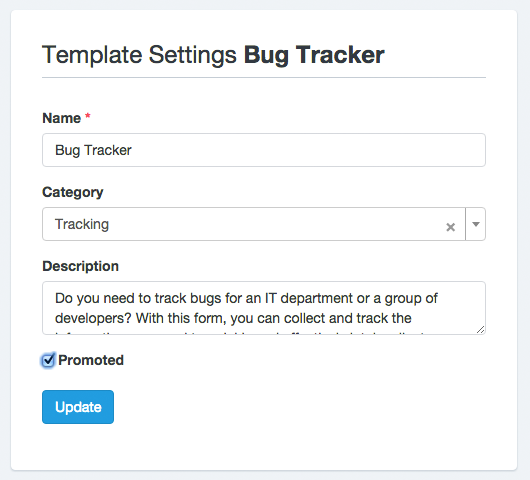
To promote a template, perchecklist the following steps:
- Go to the Template Manager
- Click the Actions button on the template to promote
- Click Settings
- Select the checkbox Promoted
- Click Update
Note: By default, the promoted Templates drop-down menu displays the last 5 updated templates.
Add Category to a Template 
To categorize a template, perchecklist the following steps:
- Go to the Template Manager
- Click on the Actions button of the template in which you are adding category.
- Click Settings
- Select a category
- Click Update
Delete a Template 
To delete a template, perchecklist the following steps:
- Go to the Template Manager
- Click the Actions button of the template to delete
- Press Delete
- A popup window will appear asking to confirm your delete template decision.
- Click OK
The Template Manager will reload and the Template will be deleted.
Note: When you delete a template, all data related to it will be deleted too. This action cannot be undone.